Setup guide
Connect your iPhone, turn on Developer Mode, and pair.
Using Alibi
Teleport, routes, saved places, and history — how each works.
Troubleshooting
Device not detected, Developer Mode, location not updating.
Billing & refunds
Plans, the 30-day guarantee, and managing your purchase.
First-time setup
Most people are up and running in about two minutes. You only do steps 1–3 once.
Connect your iPhone
Plug your iPhone into your Mac with a USB cable. Alibi talks to it directly — your real location never leaves your devices.
- Use a cable that carries data — charge-only cables won’t work.
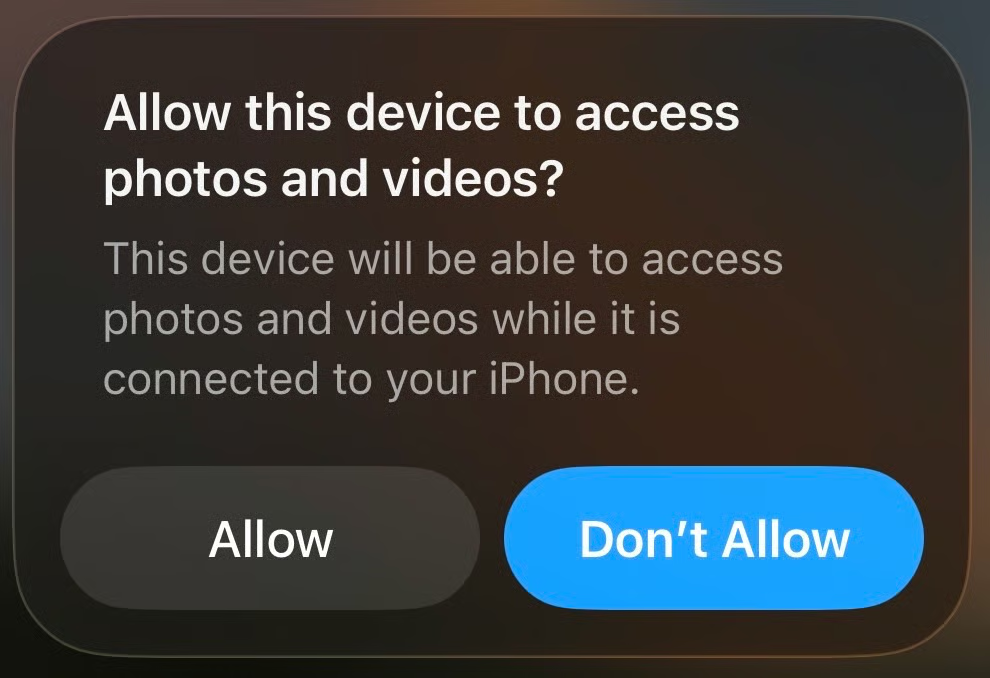
- Tap Don’t Allow if iOS asks about photos — Alibi never needs access to your photos.
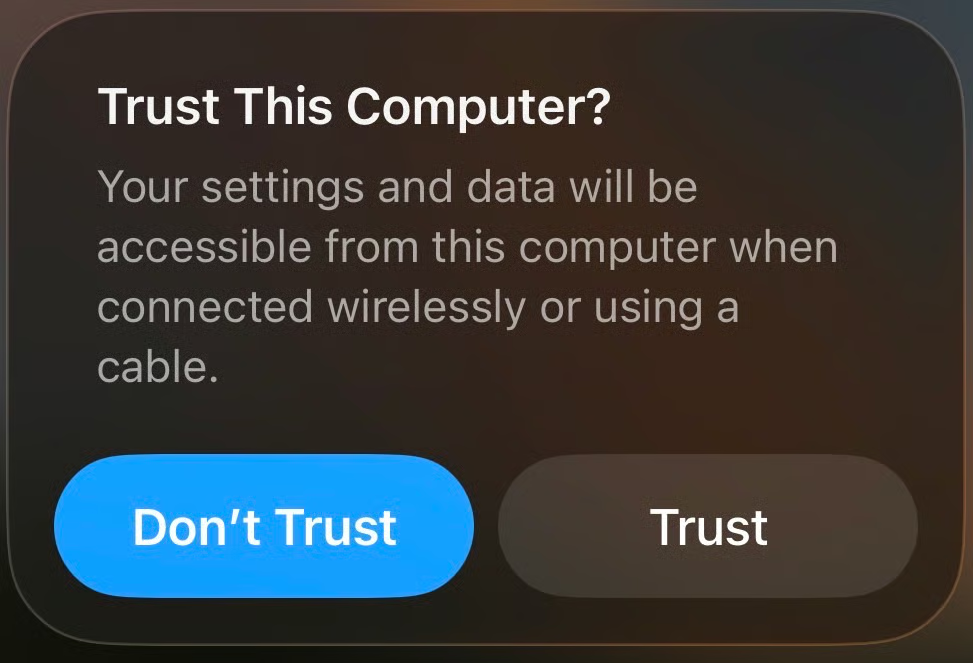
- Tap Trust on your iPhone — when the “Trust This Computer?” prompt appears, then enter your passcode.
Turn on Developer Mode
iOS only lets a trusted app set your location once Developer Mode is on. You only do this once.
- Open Settings → Privacy & Security — and scroll to the very bottom.
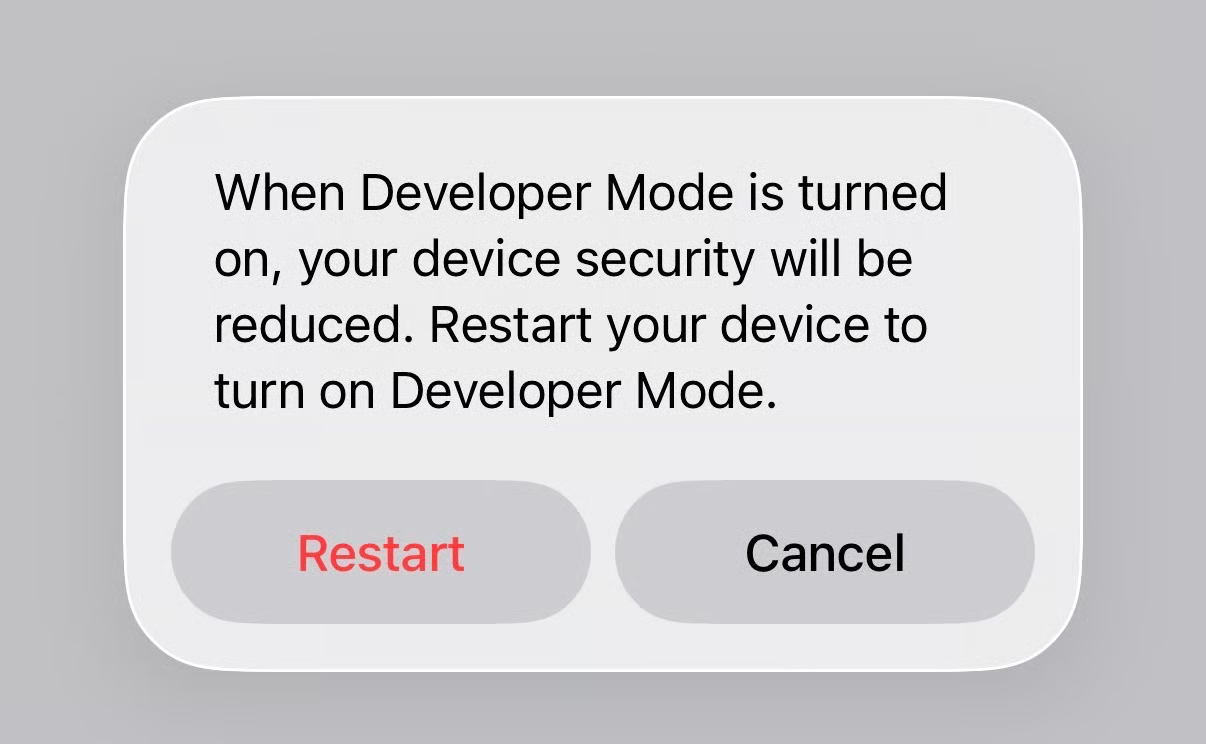
- Toggle on Developer Mode — then tap Restart when iOS asks.
- Confirm after the restart — your iPhone asks once more — tap to turn it on.

Let Alibi pair
Alibi mounts the developer image and opens a secure local tunnel — a few seconds the first time. No Xcode, no manual files.
- Keep the iPhone unlocked — and on the Home Screen.
- Enter your passcode if asked — to trust the connection.
- Wait for the green “Ready” — the device status turns green once pairing finishes.
Set your location
With the status green, pick a spot on the map and Alibi makes your iPhone appear there — for Find My, Life360, Maps and everything else.
- Search or drop a pin — the change applies in a second or two.
- Reset anytime — Reset — or just unplug — returns you to your real GPS instantly.
Tip: the same prompts appear inside Alibi the first time you open it — this page mirrors them so you can read ahead.
The two modes — and the extras
Teleport
Be somewhere instantly.
- Search an address or drop a pin anywhere on the map.
- Drag the pin to fine-tune; Alibi applies the new spot in a second or two.
- Hit Reset to snap straight back to your real location.
Routes
Look like you actually travelled there.
- Switch to Route mode, then set a start and an end — add stops in between if you want.
- Choose a pace: Walking, Cycling, or Driving.
- Preview, then start — your iPhone follows real roads at a believable speed, slowing for turns with natural GPS wobble.
- Turn on “Stay at end” to remain at the destination once the trip finishes.
Saved places
Your regular spots, one tap away.
- Save any location — or a whole route — as a bookmark.
- Reopen it later to jump straight back, no re-entering anything.
History
Pick up where you left off.
- Alibi keeps your recent locations and routes automatically.
- Tap any past entry to return to it instantly.
Common fixes
My iPhone isn’t detected
Use a cable that carries data (not a charge-only cable), try a different port, make sure the iPhone is unlocked, and tap Trust when the prompt appears.
Status says “Developer Mode off”
Re-enable it in Settings → Privacy & Security → Developer Mode, then restart the iPhone. Alibi only spoofs once the status reads green/“Ready.”
The location won’t change
Keep the iPhone unlocked and on the Home Screen while Alibi pairs. Reset and try again; rebooting the iPhone forces a fresh GPS fix.
How do I get back to my real location?
Click Reset — or simply unplug. Alibi clears the spoofed location the moment the iPhone disconnects.
Still stuck? Email the team →
Talk to a human.
No bots, no ticket maze. Email us directly and a real person on the team gets back to you — usually within a business day.